Okay well first I have to say I'm well cheesed off!! :mad: I went to the massive effort of changing the clutch on my car taking about 5 hard afternoons work. I put in a 3 piece kit consisting of friction plate, pressure plate and slave cylinder (CSC). I didn't replace the dual-mass flywheel (DMF) because it seemed in good condition going by the test info LUK give. However, it still judders on the biting point so it must actually have needed a new flywheel!!!!
First, jack up the car with a good amount of space below it. Take the wheels off and the plastic covers. Disconnect the battery.

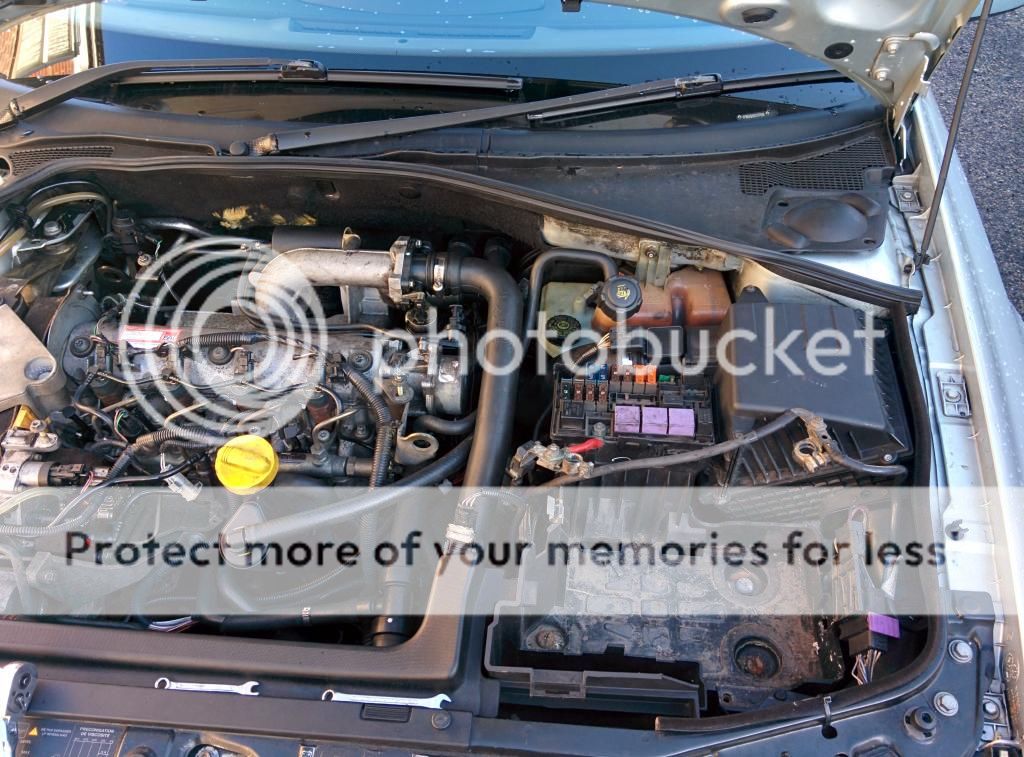
You need to clear space in the engine bay above the transmission so:
Remove relay box from the back of the battery holder and remove battery tray.

Remove ECU and disconnect.


Disconnect the red wire that is bolted on top the relay box and also the wires that slot onto the back of the relay box. Note where they go and the fuses position.

Remove the air pipe from intercooler to intake manifold.


Remove air pipe from turbo to intercooler.


Remove Air pipe from filter to turbo.


Remove air filter box.
Disconnect the gear linkages. There is a little button in the middle of the connector that releases it from the ball on the gearbox lever. Also disconnect the sensor wires. One on the front of the transmission (crank sensor) and one on top of the transmission (reverse switch).


Drain gearbox oil.

Remove drive-shafts:
Take the central driveshaft nuts off.

Left side (short) - the shaft simply fits between wheel hub and gearbox so if you release it from the hub it can pull out, but first you need to unbolt the rubber cover that seals it to the gearbox. There are 3 bolts.


Now you need to release it from the hub so take the steering arm off the hub and remove teh two bolts that hold the top of the hub to the suspension strut.


The hub should now move freely on the bottom ball-joint and pull the driveshaft slightly out the gearbox with it. If you put the driveshaft nut on the end of the shaft you can hammer it and it will slide out from the middle of the wheel hub. Once the shaft is out don't leave the hub hanging on theb all joint, put something in the bolt hole to lock it with the suspensuion strut.


Right side (long) - There is a support for the shaft half way along with a bearing. This bearing is held in the support by a cover plate that has 2 bolts and needs removing. Now remove the steering arm and the two top bolts from the hub as you did on the other side. Tie the hub with a little slack to the suspension strut. You need to go under the car and free the bearing from the central support. Just get a screwdriver in there and lever the shaft out against the support bearing housing. Now you can go back to the hub and take it off the tie-wrap or whatever you used to stop it falling down too far and then tap the driveshaft free from the hub.


Now you need to clear some space to the side of the transmission so you can slide it off the engine block and flywheel. You need to take off the bars at the side between the wheel arch and the aluminium sub-frame bar thing. Remove the cross-member at the ffront and unbolt that sub-frame bar from the bumper end of the car. If you have xenon you need to unbolt the bracket holding the level sensor.


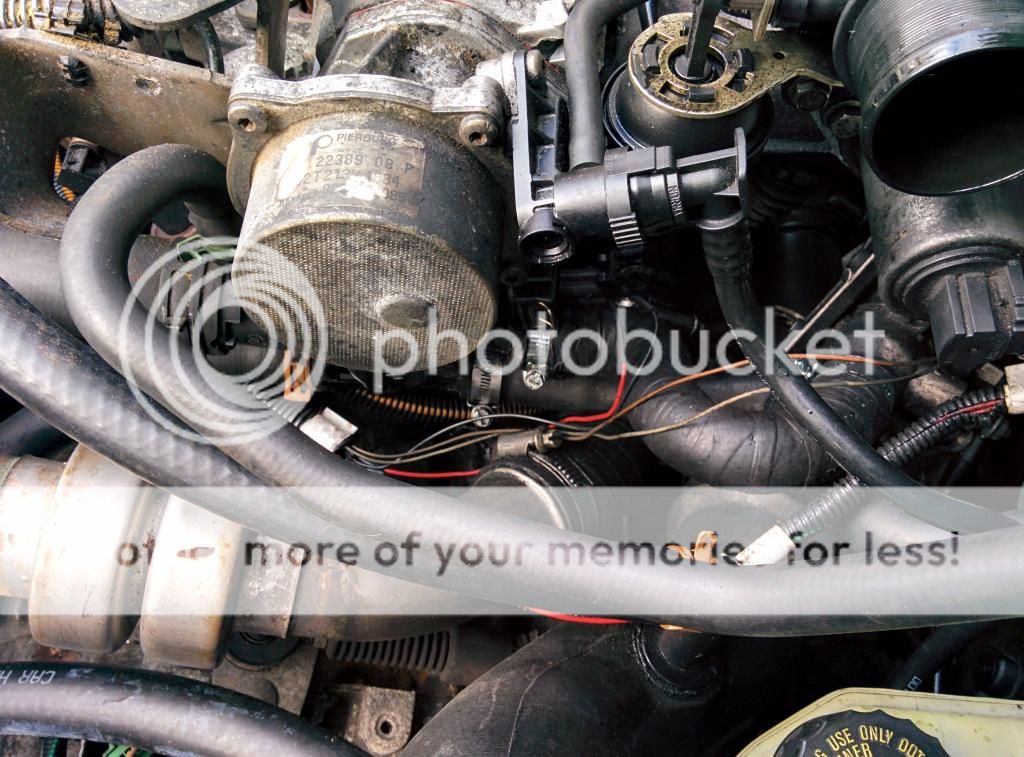
You need to unbolt the bracket that holds a power steering pipe to the side of the transmission. there are two bolts but it may be easier to do this once the box is lowered down a little (but don't forget it and lower the box all the way).

You can also release a bolt that holds another power steering line at the back where the power steering rack is. This will need to be free to wiggle it around the side of the transmission when you start to lower it.

You now need to remove a bracket that goes between the transmission / clutch bell-housing and the exhaust. It has two bolts at the exhaust end and is held at the other end by a stud on one corner and a bolt with an earth wire at the other corner.


Unbolt the starter motor. Note where the bolts go because some are longer than others. The same is true for the bell-housing so keep a note of bolt lengths and stud positions. Some of the bolts (one I think) are accessible from the top of the engine bay while the other two need to be attached from underneath,. Just push the motor out the way to the back of the engine. I think I was resting mine on the exhaust manifold.


Place a bar over the engine bay to hang the transmission from. I used a ratchet strap so I could lower and raise the transmission. My bar placment in this image wasn't that great, I had wanted to hang the engine bliock too, but it was better to support udner it. The bar needs to be more stright across the engine bay.


Support the engine block under the sump where it connects to the transmission because when you take the transmission away that side will not be supported at all.

Now you can remove the left hand engine mount. Take the bolt out the top, then take the two bolts out either side to remove the rubber part. Now take the mount bracket off the transmission because it would get in the way later.


Finally, you can take the bolts out from the bell-housing and the engine block and slide the transmission out from the engine and flywheel. Use a screwdriver between the engine block and the bell-housing to lever them apart.


First, jack up the car with a good amount of space below it. Take the wheels off and the plastic covers. Disconnect the battery.
You need to clear space in the engine bay above the transmission so:
Remove relay box from the back of the battery holder and remove battery tray.
Remove ECU and disconnect.
Disconnect the red wire that is bolted on top the relay box and also the wires that slot onto the back of the relay box. Note where they go and the fuses position.
Remove the air pipe from intercooler to intake manifold.
Remove air pipe from turbo to intercooler.
Remove Air pipe from filter to turbo.
Remove air filter box.
Disconnect the gear linkages. There is a little button in the middle of the connector that releases it from the ball on the gearbox lever. Also disconnect the sensor wires. One on the front of the transmission (crank sensor) and one on top of the transmission (reverse switch).
Drain gearbox oil.
Remove drive-shafts:
Take the central driveshaft nuts off.
Left side (short) - the shaft simply fits between wheel hub and gearbox so if you release it from the hub it can pull out, but first you need to unbolt the rubber cover that seals it to the gearbox. There are 3 bolts.
Now you need to release it from the hub so take the steering arm off the hub and remove teh two bolts that hold the top of the hub to the suspension strut.
The hub should now move freely on the bottom ball-joint and pull the driveshaft slightly out the gearbox with it. If you put the driveshaft nut on the end of the shaft you can hammer it and it will slide out from the middle of the wheel hub. Once the shaft is out don't leave the hub hanging on theb all joint, put something in the bolt hole to lock it with the suspensuion strut.
Right side (long) - There is a support for the shaft half way along with a bearing. This bearing is held in the support by a cover plate that has 2 bolts and needs removing. Now remove the steering arm and the two top bolts from the hub as you did on the other side. Tie the hub with a little slack to the suspension strut. You need to go under the car and free the bearing from the central support. Just get a screwdriver in there and lever the shaft out against the support bearing housing. Now you can go back to the hub and take it off the tie-wrap or whatever you used to stop it falling down too far and then tap the driveshaft free from the hub.
Now you need to clear some space to the side of the transmission so you can slide it off the engine block and flywheel. You need to take off the bars at the side between the wheel arch and the aluminium sub-frame bar thing. Remove the cross-member at the ffront and unbolt that sub-frame bar from the bumper end of the car. If you have xenon you need to unbolt the bracket holding the level sensor.
You need to unbolt the bracket that holds a power steering pipe to the side of the transmission. there are two bolts but it may be easier to do this once the box is lowered down a little (but don't forget it and lower the box all the way).
You can also release a bolt that holds another power steering line at the back where the power steering rack is. This will need to be free to wiggle it around the side of the transmission when you start to lower it.
You now need to remove a bracket that goes between the transmission / clutch bell-housing and the exhaust. It has two bolts at the exhaust end and is held at the other end by a stud on one corner and a bolt with an earth wire at the other corner.
Unbolt the starter motor. Note where the bolts go because some are longer than others. The same is true for the bell-housing so keep a note of bolt lengths and stud positions. Some of the bolts (one I think) are accessible from the top of the engine bay while the other two need to be attached from underneath,. Just push the motor out the way to the back of the engine. I think I was resting mine on the exhaust manifold.
Place a bar over the engine bay to hang the transmission from. I used a ratchet strap so I could lower and raise the transmission. My bar placment in this image wasn't that great, I had wanted to hang the engine bliock too, but it was better to support udner it. The bar needs to be more stright across the engine bay.
Support the engine block under the sump where it connects to the transmission because when you take the transmission away that side will not be supported at all.
Now you can remove the left hand engine mount. Take the bolt out the top, then take the two bolts out either side to remove the rubber part. Now take the mount bracket off the transmission because it would get in the way later.
Finally, you can take the bolts out from the bell-housing and the engine block and slide the transmission out from the engine and flywheel. Use a screwdriver between the engine block and the bell-housing to lever them apart.
Aucun commentaire:
Enregistrer un commentaire